Today we’re featuring car seat expert Samantha Kastelz and her business Latch On Jacksonville. If you are having a child or just want to make sure you’re car seat is installed safely, I HIGHLY recommend giving Samantha a call!
What do you specialize in: Child Passenger Safety, Car seat Safety, CPST
When did you open: During National Child Passenger Safety Week in September 2020
How did you get interested in this line of work? I became a CPST after having my son, though car seat safety was important to me before having my daughter. I was t-boned in a car accident in October 2013 and still suffer side effects today. When I was pregnant with my daughter I did a lot of research on car seats and attended the Safe Kids seat check with my mentors Danielle & Tina. I just couldn’t imagine a child with low bone ossification being in an accident and sustaining injuries the way I did…and my accident was considered minor.
What is something about your business that sets you apart? We only have a few other practicing CPST’s in Jacksonville and they work through The Players Center for Child Health/SafeKids. I offer concierge, in-home education on car seat safety. We go over your seats safety features, proper harnessing and vehicle installation.
What is something about your business that most people might find interesting? I am the only business of this kind in Jacksonville and one of only a few in the country. (Something unique, interesting, different, etc.)
What’s the best advice you’ve ever received? Don’t be afraid to say you don’t know and to ask questions. There are hundreds of different vehicle and car seat combinations and we can’t know everything! But we have access to a network of people and manufacturers and if we don’t know someone is bound to!
For a little fun….
Where were you born? Riverside Hospital in Jacksonville, it doesn’t exist anymore
How did you end up in Jacksonville? Born and raised! Although we did live in North Carolina for 5 years while my husband was in the military
Where’s your favorite place to travel? We love to travel! I loved our trip to Costa Rica and hope to go back one day soon!
Where do you want to travel to next? We almost always have a “next” planned. I think it will be Lake Oconee
What are your hobbies? I do Pilates 5-ish days a week and am making it a habit to walk on the beach for some peace and quiet at least once a week
Do you have any pets? 2 dogs: a 10-year-old lab, Molly, and 6 month old crazy double doodle named Pretzel.
Do you have any interesting talents? No really LOL
Where can people find you at?
Check her and other awesome local vendors out on our Resources page.
We asked a local sleep expert for some tips and info about getting babies to sleep at night!
Katie Kuncho owns Katie Ks Sleep Consulting, and lives here in Jacksonville with her husband Rodney and son, Owen.
I have experienced first hand how tricky sleep can be for a new baby. While experiencing sleep troubles with my son, I went on a mission to find out how to help him. What I found is that there are ways to help your child learn independent sleep skills without feeling mom’s guilt. Once I understood what was happening, I felt guilty for not helping him sooner! Watching Owen’s transition and how it has changed our lives is what has led me on the journey of helping other families get the quality sleep that they deserve. I am passionate about helping families because I know how important sleep is to both baby and parent’s health. It’s a necessity. Not a luxury.
There’s no such thing as a casual mom. This gig is full-time, no matter if you’re a stay-at-home-mom, a working mom, or somewhere in between. Your kids are on your mind 24/7, no matter what else might be going on, so we tend to do a lot of research, and with access to unlimited data via the internet, Barnes & Noble, or your mother-in-law, (the latter having the most to say, by a mile) it’s inevitable that we get some conflicting information. Sometimes it’s even hard to sort out the opinions versus the facts. So today, I want to focus on my area of expertise, that being sleep, and try to dispel some of the more popular myths I’ve seen in parenting forums, heard from Mom groups I’ve talked with, or even heard from a well-intentioned family member or friend.
1. Sleeping too much during the day will keep the baby up at night. Not likely, except in extreme cases. Unless your little one is sleeping practically all day and up all night, you probably don’t need to concern yourself with the length of their naps. Newborns especially need a ton of sleep. In fact, up until about 6 months, I don’t recommend that your little one be awake for more than about 2 – 2 1/2 hours at a time. For newborns, that number is more like 45 minutes to an hour.
What keeps babies awake at night, more than anything else, is overtiredness. You might think that an exhausted baby is more likely to sack out for a full night than one who slept all day, but it’s actually just the opposite. The reason we refer to it as being “overtired” is because baby has missed the “tired” phase and their bodies start to kick back into gear, which keeps them from falling and staying asleep. A baby who has gotten a decent amount of sleep during the day is far less likely to miss the sleep window.
There are substantial variations depending on baby’s age and the length of their naps, but up to that 6 month mark, it’s really not uncommon for baby to be sleeping around 5 hours a day outside of nighttime sleep, so if your little one is still within those guidelines, let them snooze. Bottom line is sleep begets sleep, the better baby naps during the day, the better they will sleep at night.
2. Sleeping is a natural development and can’t be taught. Sleeping is natural, absolutely. Everybody wakes up and falls back to sleep multiple times a night, regardless of their age. So no, you can’t teach a child to be sleepy. What can be taught, however, is the ability to fall back to sleep independently.
The typical “bad sleeper” of a baby isn’t less in need of sleep, or more prone to waking up. They’ve just learned to depend on outside assistance to get back to sleep when they wake up. Once your little one has figured out how to get to sleep without assistance from outside sources, they start stringing those sleep cycles together absolutely effortlessly, and that’s the secret to “sleeping through the night” as most parents understand it.
3. Babies will naturally dictate their own sleep schedule. The idea that infant physiology is so flawlessly, naturally programmed to regulate a baby’s schedule is, to be blunt, laughable. Nothing against Mother Nature, but she doesn’t provide us with a ready-to-run baby. Our babies need extensive care and help in their development, and their sleep cycles are unbelievably erratic if left unregulated. If they miss their natural sleep cycle by as little as a half hour, their cortisol production can increase which causes a surge in energy, and things quickly spiral out of control.
So as much as I wish babies could just fall asleep when they’re tired, it simply doesn’t work that way. That’s not to say that you shouldn’t respond to their cues, but you shouldn’t rely exclusively on them either.
4. Sleep training is stressful for the baby and can affect the parent-child attachment. Nope. And this isn’t just me talking here. This is the American Academy of Pediatrics. If there’s a more reliable source of baby health information, they’re astoundingly bad at marketing themselves. And according to a 2016 study* conducted by eight of their top researchers, behavioral intervention, (A.K.A Sleep training) “provide(s) significant sleep benefits above control, yet convey(s) no adverse stress responses or long-term effects on parent-child attachment or child emotions and behavior.” Not a whole lot of gray area there.
5. Babies are not “designed” to sleep through the night. Trusting your child’s physiology to dictate their sleep schedule, their eating habits, their behavior, or just about any other aspect of their upbringing is a recipe for disaster.
Is your toddler designed to eat three pounds of gummi bears? Surely not. Will they if you don’t intervene? Without a doubt. Is your baby designed to avoid predators? If so, nobody told my little one, who would have happily hugged a hungry Siberian tiger if it approached him. (He might still, I don’t know. It’s never come up.) Our little ones need our expertise and authority to guide them through their early years, and probably will for decades after that. This is especially true when it comes to their sleep.
Some babies are naturally gifted sleepers, for sure, but don’t rely on the advice of those who tell you that babies should dictate their schedules. You’re in charge because you know best, even if it may not feel like it sometimes.
There are obviously plenty more myths and misconceptions surrounding babies and their sleep habits, but these are some of the most important to get the facts on. Remember, there are endless posts on social media and websites that portray themselves as factual, but there’s nothing stopping them from making that claim, regardless of their accuracy or basis in actual scientific evidence.
Google scholar is a great place to find peer-reviewed scientific study on all things baby-related, and trusted sources like the American Academy of Pediatrics, the National Institutes of Health, Britain’s National Health Service, Canada’s Hospital for Sick Children, the World Health Organization, and other national children’s health organizations are excellent sources of information you can feel confident about using to answer questions about your baby’s health.
And if you want more information about the benefits of sleep, I’m willing to chat!
In an effort to feature local businesses during Covid, we are playing “tag”. We are asking local companies info about their favorite places. And then we ask some of the companies they tag about their favorites!
Random Fandom Gifts was recently tagged as a favorite by another local company so here they are:
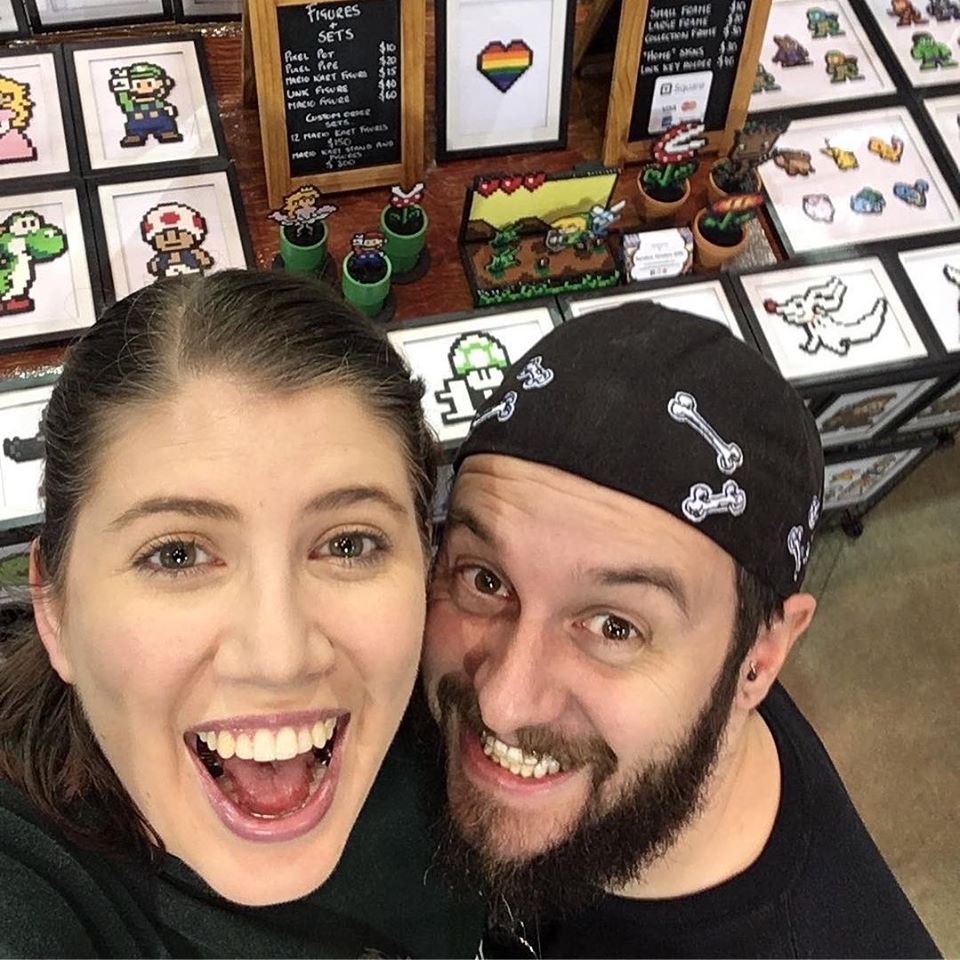
Your name: Alexis Kaisharis and Rich Oliver
Where are you located: You can usually find us at Riverside Arts Market, but you can always find us on our website www.randomfandomgifts.com
Tell me about your business.
We hand make pixelated artwork, home decor, and accessories representing all kinds of pop culture across all medias. Our pieces can range from 100 beads to 10,000 beads; our biggest piece ever was actually 30,000 beads. Everything we make we do it with pure geeky love. We’re bringing geeky goodness to everyone, and our goal is to make everyone’s pixelated dreams come true!
Now that you’ve been tagged, tell me your favorites!
FOOD
What is your favorite local restaurant for date night? Orsay
What is your favorite food place to go with family? Leaderboard Arcade
Who has the best sandwiches? Eddis & Sons
Best pizza? Pie 95 Pizza
What toppings MUST go on a pizza? Cheese, Pepperoni, and Canadian Bacon
What should NEVER go on a pizza? Pineapple or any fruit, except tomatoes.
Best Mexican? El Jefe
Best Chinese? Tim Wah Dim Sum
Best burger? JoyShtick
Best fries? JoyShtick
Best bar? Rec Room
Best BBQ? Twisted Okie
Favorite food truck? Pie 95 Pizza and Fusion Food Truck
Favorite place to get dessert? 1748 Bakehouse
ACTIVITIES
Favorite activity around town that’s free? Riverside Arts Market
Favorite activity/place to go, that costs money around town? The Cummer Museum
Best local band or musician? The Fire Water Tent Revival
SERVICES
Best place to get a hair cut? Red Hot Looks
Best realtor? Lou Morales Realty, David Morales
Do you have any tattoos? Who would you recommend? Melaniinks at Dark Matter
AROUND TOWN
Favorite mom & pop shop? Darby’s Dungeon, Bellalina Bath and BelloBoopie
Favorite side of town? Riverside
Favorite local event? Riverside Arts Market and the GAAM Show.
What local charities do you like to support? First Coast No More Homeless Pets and JASMYN.
What is the most underrated shop or company in North Florida that everyone should know about? Bijubee Jewelry, plus maybe also us lol
Best place to get married or have a big party? Congaree and Penn
Best place to get fresh veggies and fruit? Riverside Arts Market
Anyone we missed? All of the amazing artists in Jacksonville! Elena Ohlander, Chappy Lips by Leslie Valerio, Hypnoticat, Olivia Gonzalez (Garage Roses), and R.L. Pyro Art are some of our favorites
With everything going on, the need to support other small businesses is more important now than ever. On the last flight I took, I saw a magazine and they interviewed local business owners and those business owners mentioned their favorite businesses, and then THOSE businesses were interviewed, and it kept going.
So, we are doing a “TAG! You’re it” Local business feature to help get the word out about a lot of local businesses that I hope you’ll patronize!
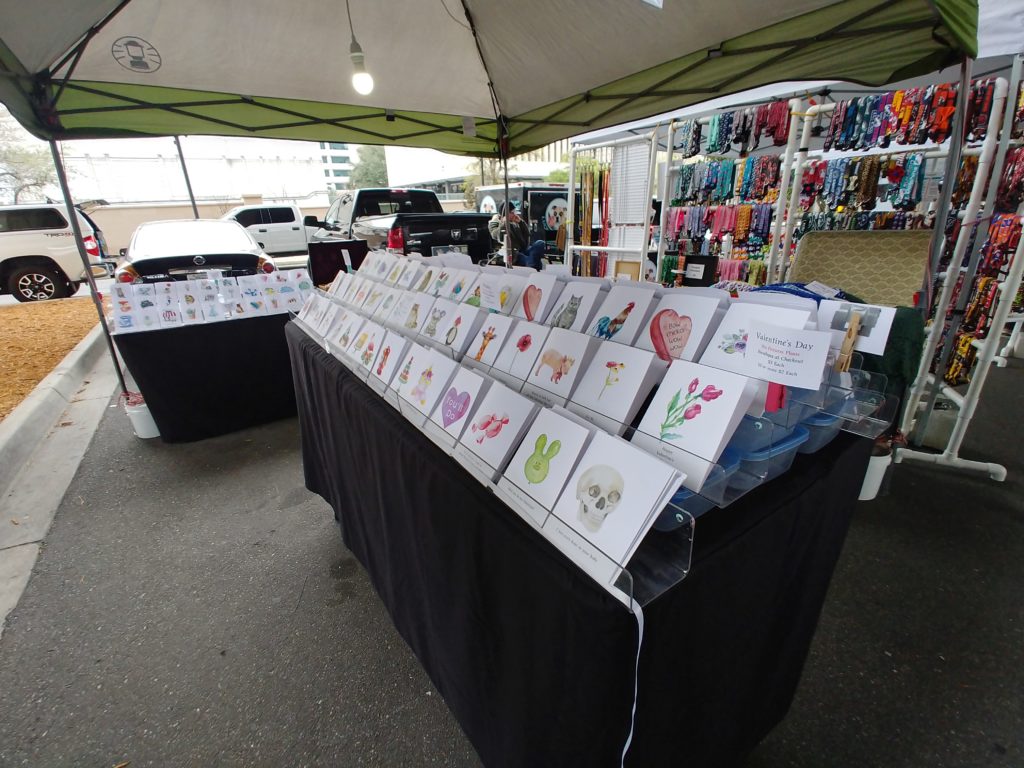
The first is Bello Boopie, who makes paper goods, like cards and stationary, you may have seen them at Riverside Arts Market.
Your name: Noel a.k.a. The Minion Man
Where are you located: Riverside Arts Market, Orange Park Farmers & Arts Market, Art Walk Downtown Jacksonville. In Store: Trove Antiques and Coconut Barrel
What makes your business unique? Bello Boopie isn’t afraid to push the boundaries. Most Greeting Cards come blank or with sentimental greetings; our greeting cards are geared to make people laugh.
What’s the favorite thing you sell? Our locally inspired greeting cards that make fun of Floridians
FOOD
What is your favorite local restaurant for date night? Hawkers 5 points
What is your favorite food place to go with family? Clarks Fish Camp
Who has the best sandwiches? European Street (Park Street Location)
Best pizza? V’s Pizza!
What toppings MUST go on a pizza? I’m a Cheese kinda guy!
Best Chinese? Peony Asian Bistro
Best bar? Park Place
Favorite food truck? Pie95
Favorite place to get dessert? Community Loaves
ACTIVITIES
Favorite activity around town that’s free? Riverside Arts Market
Favorite activity/place to go, that costs money around town? Jacksonville Zoo & Gardens
Best local band or musician? Jacksonville Symphony (I’m an old soul)
SHOPPING
Best place to get fresh veggies and fruit? Riverside Arts Market and Orange Park Farmers and Arts Market
SERVICES
Best place to get a hair cut? Barbara Fisk at Beauty Boss Hair Studio
Best realtor? Mary Ann Eldreth
Best massage therapist? Brenda Star Walker
AROUND TOWN
Favorite mom & pop shop? Trove Antiques
Favorite side of town? Riverside/Avondale
Favorite local event? (Party, sports, concert, whatever) Weekly: Riverside Arts Market. Yearly: Boat Lighting Parade
What local charities do you like to support? JASMYN, V for Victory, and First Coast No More Homeless Pets
What is the most underrated shop or company in North Florida that everyone should know about? Coconut Barrel
Best place to get married or have a big party? Old St. Andrews
Best Local Maker: Random Fandom Gifts
Best Fur Friendly Company: A tie: Lucy Lou’s Designs for collars and leashes, Bubbas Bistro for pet treats
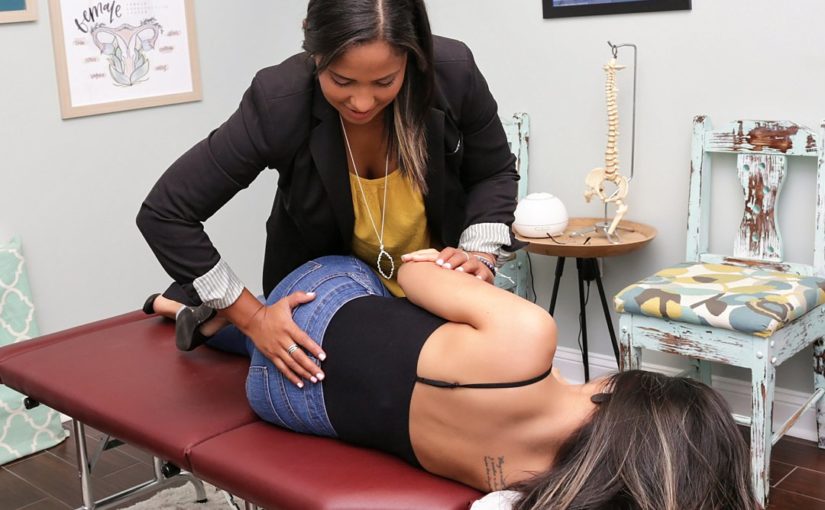
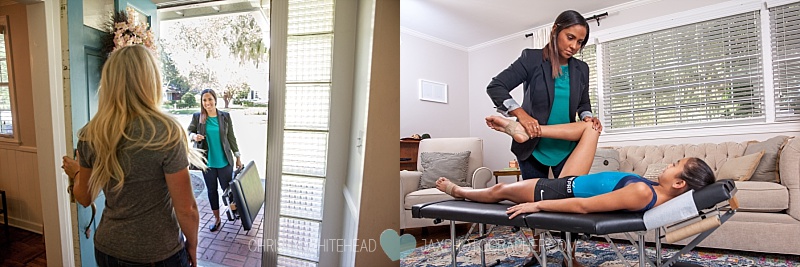
Tips to improve your workspace and posture at home, byDr Cristina Padilla, Chiropractor, Owner at Thrive Family Chiropractic, a house call chiropractic practice serving the NE Florida region.
Are you one of the thousands of employees or business owners who has been forced to work remotely during the COVID-19 pandemic? Chances are, you never thought this would be a long-term practice you needed to adapt and prepare for, right? I certainly wasn’t.
Most of us don’t have a dedicated office in our homes, because we never had to work from home for longer than a few hours here and there or maybe just to meet a deadline or project occasionally. Personally, I have been spending a lot of extra hours on Zoom calls and meetings as well as helping patients virtually. And my back and neck are feeling it. The irony of being a Chiropractor …? I can’t adjust myself!
The most common complaints I have been getting from practice members these last few weeks have been: increase in headaches, neck and low back pain and stiffness. Why? They are working out of their couch, bed, dining room table, kitchen counter. They don’t have their nice and comfortable desk chairs and their workstations at home are less than ideal. Not only is this physically a problem, but ask your significant other to take a photo of what you look like while “in the zone”, working from home? Chances are you are hunched forward, your chair doesn’t have any back support and you are looking down way more than you should.
Not only is posture affected by these “new workspaces” but these changes in ergonomics can also lead to increase in headaches, trouble focusing and decrease in physical activity, all damaging to your body and health.
So here are a few tips to help improve your workstation and relieve some of the tension in your spine. As always, a visit to the Chiropractor (virtual if you would like) is highly encouraged to provide you with a long term plan to improve posture and overall health.
Couches are for slouchers. Yes. I know. But someone had to tell you! Couches are made for comfort, not with good posture in mind. Most of them are soft and deep and they do nothing good for your spine when you are on episode 4 of Tiger King or at the Monday morning team meeting (wearing sweatpants …isn’t it wonderful!?)
Another option is a sturdy chair, like a dining room chair, that has padding for you to sit on. For this, you may want to use a decorative pillow to support your low back or order a lumbar support pillow online. These are pretty inexpensive.
The bed and couch are the worst options because not only do they not provide good support, you have no way of keeping your workstation at eye level (more on this below) unless you have a portable desk that props up to keep your screen and devices at eye level as well as your keyboard and/or mouse as close to your body as possible.
Movement is life. Movement is important to increase bloodflow to your arms, legs and to get your heart rate up throughout the day. While there are a number of gyms and personal trainers providing free or inexpensive online workouts (North Jax Crossfit is my go to!), a lot of people may not be as inclined to exercise at home, because they don’t have equipment, they get lazy, they don’t have a partner to workout with … you name it, I’ve done it.
Two things that have worked well for me:
First, set up a simple workout station in an area that I tend to walk by a lot. I recently decided to put a yoga mat in my bedroom and I have been following a challenge in April of doing 50 burpees a day (I’m gonna be super honest…it’s not happening every day. But it’s happening a lot more than before – and it only really takes a few minutes! If you try it, post on social media and tag me @jaxmobilechiropractor )
Secondly, set up a timer for 5 minutes an hour of stretching and movement. Whether it is walking a few laps around the house, doing a few Sun Salutations (great stretch and easy to do!) or to do a few squats and jumping jacks – there is a lot of research supporting these can help boost your energy and give you focus!
Water challenge. While you are up, go get a water refill. I try to use the largest glass or tumbler I have and every time I complete a task, a video call or the end of the hour, I make a point to finish my water and pour some more. Remember, you should be drinking half your body weight in ounces of water a day – more if you are an avid coffee drinker like me. For every cup of coffee, add one cup of water! Make your water fun – berries, lime, lemons, oranges, cucumbers are refreshing ways to make water fun!!! I am currently obsessed with Arbonne’s Hydration tea (chamomile and other herbs, no caffeine!). Email me if you would like some samples!
I hope these tips are easy for you to implement to your daily routine. I have created a short exercise and stretching program specific to reverse the long hours of sitting at a desk, along with an article from Physitrack that exapands on how to evaluate if your workspace is ideal for you and your posture.
If you would like a digital copy of these or to schedule a complimentary ergonomic evaluation, please email thrivefamilychiro@yahoo.com or contact me via Facebook or Instagram at @jaxmobilechiropractor . Let’s Thrive!
Being in quarantine we are playing some games, mostly on the phone, BUT we own A LOT of games. We like to camp and go on group vacations with friends. It can be hard to pick out games, I mean, there are TONS, so here are some recommendations from our household to yours.
Let me know on facebook your favorites or any that we missed and should try:
ALL AGES
Spot It— This game, no joke, is great for the youngest in your group to the oldest. I often pack it with me on family trips. We played it last summer with my son who was 4 at the time and my great aunt who is maybe 80.
It sounds crazy, but there are a set of pictures on each card and not every card has the same set of pictures, but they each have ONE image that matches. Your job is to be the first to find the match. I swear, sometimes I feel like there’s no way something matches, but there is! Great game, easy and quick to learn, not much to set up. Highly recommend it.
There are different themes too, like camping or Disney.
This one is good for most ages. The kids seem to really like it. I play it with them sometimes.
Other Card Games
Phase 10 is a go to game in our house. It’s like Rummy, I’m told (I’ve never actually played Rummy!). You have to make sets, etc, and each round is different. My 9yo likes to play this one with us.
I haven’t tried Snappy Dresser, but this 3 pack of games is a good deal and includes Uno!
Apples to Apples Type Game Play
Apples to Apples is a classic game. One person is the judge and they read a card, like “Next best thing since sliced bread” and every person has to give a card with their answer. The judge than picks their favorite answer.
This type of game may sound vaguely familiar to adults. Cards Against Humanity plays off this same idea. If you want a truly vulgar, 18+ politically incorrect game, CAH as it’s commonly known, would be my suggestion. Don’t forget add on packs for even more fun. I like the blank cards so you can add your own!
But, if you want something similar, but the kids want a good laugh too, try this one: Kids Against Maturity.
Domino Style Games
Qwirkle is a popular game in our house. It can be super tricky. you have to match the color or shape and you can’t duplicate in a row.
They have a new travel version and a new Qwirkle Cubes we haven’t tried yet.
We bought this one and we haven’t completely figured it out, but my daughter def. likes it.
Super Silly Games
This one is super popular online. We have one like this and haven’t gotten around to playing it yet!
We’ve only played Taco Cat Goat Cheese Pizza once. It’s a group memory game. You have to say the right word in the right order if you want to win. It’s harder than you would think.
Face Off. This one currently isn’t available on Amazon, as of my writing this, but this one is GREAT for groups. We have used it at home and with our Girl Scout gatherings. I would say ages 7+ would be best.
Word Games
If you like Scrabble or Words With Friends, I recommend Quiddler. It has rounds, kind of like Phase 10 (see other card games section). You can play a game in 15-30 minutes, depending on how many people are with you. I haven’t played it with my 9yo yet, but I think she could do it with some help.
Solo Play
Kanoodle is like a puzzle. My 9yo likes it. I bought it after seeing teachers request it.
Other Highly Rated Games
It took us a little bit to figure this one out, but once you do, it is a great game for the older crowd especially. If you have adults in your group who love to compete in Monopoly, THIS is the game for them. They even have different versions like a Game of Thrones one!
We bought Ticket To Ride from Target on like a Black Friday deal. We’ve broken it out once but haven’t completely played it yet. One of my friends said her family loves it and it’s like Monopoly but with trains. They do have MANY different options for this one, like individual country ones. There’s also a version for younger kids, called First Journey.
This next one, looks REALLY interesting an is actually cheaper and you can play with Alexa!!
If you like Connect 4, Santorini is like a 3D version. My daughter and I sometimes play this one. It’s a bit more complex than Connect 4 though. So I would say 8+ for this one.
Game Night In a Can. We bought this for a big family get together. We ended up not using it for that, but the girl scouts did and they loved it. I would recommend this for a business that is doing team building and scouts type stuff. Note: The can has changed and I’m not sure if they added new stuff to it, but it might be even better now?!
A Bit Harder
So, I bought this game about a year ago and it may hit too close to home for you right now, but that’s ok! If you have anyone who REALLY likes hard strategy games, this might be the one for them. Honestly, we brought this on vacation with our friends, and the guys were youtubing videos on how to play this and we still had deep discussions on what was the right way to do it. It is a highly rated game though. A bit too much for our house though!
In conclusion
I know that’s a lot of games, but we actually own MANY MORE than what I listed!!!! It’s crazy.
The games we usually bring with us on trips are: Spot it, Phase 10, Catan, and Quirkle.
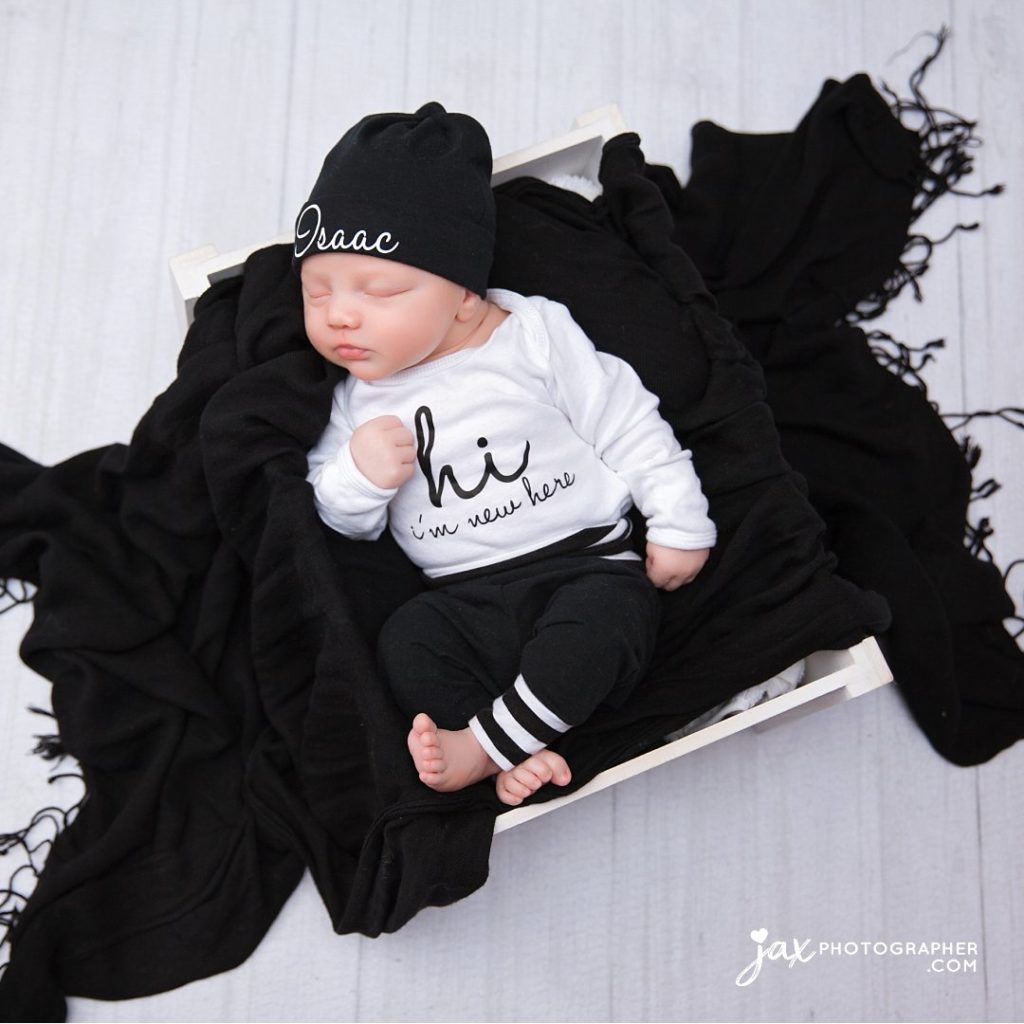
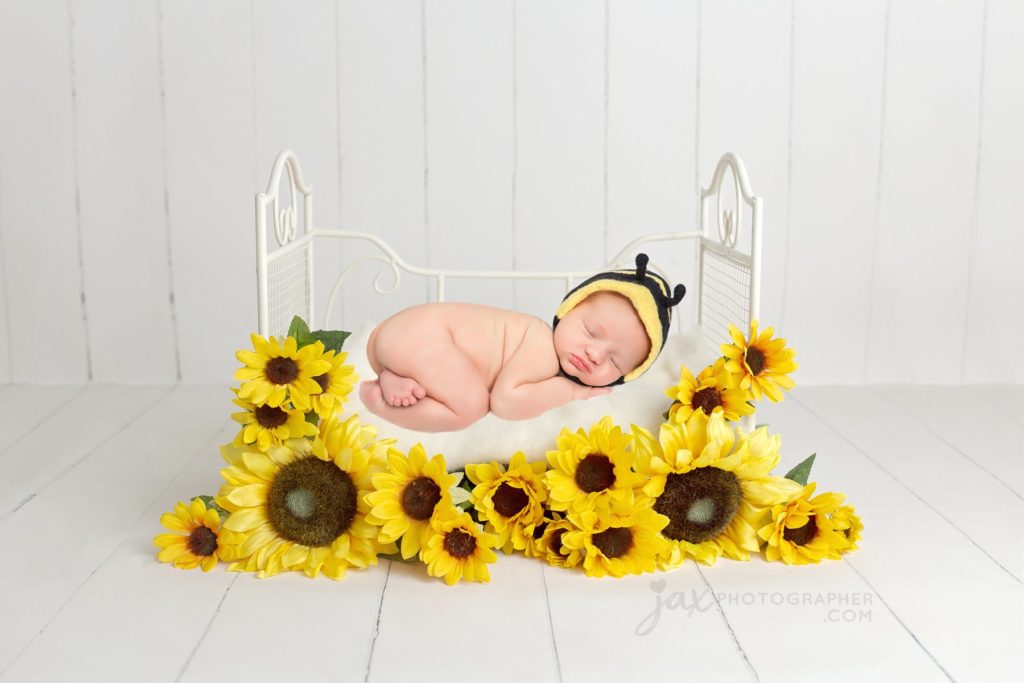
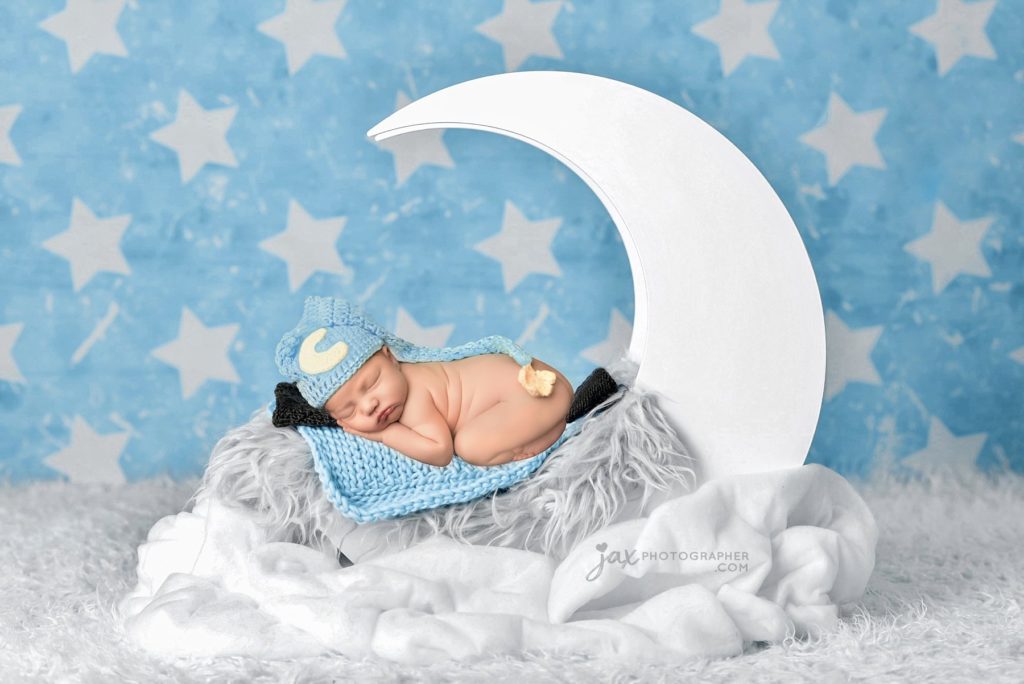
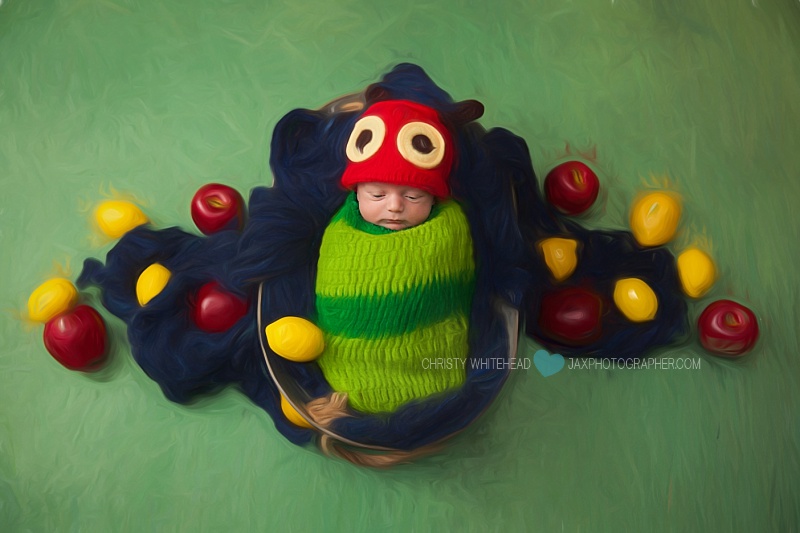
When Christy Whitehead isn’t writing about all her crazy board games, she owns Christy Whitehead Photography, a studio in Jacksonville, Fl. She specializes in maternity, newborn, families, cake smashes and corporate work.
+Please note these may be affiliate links and we may make a little bit of money when you click on one to buy! Please let us know how you liked the games or if you have any new ones we should try!
Since the studio is temporarily closed because of quarantine, I’ve been doing a lot of sewing. Mostly masks-for myself, my family, the medical community and anyone who has asked.
I’ve also been getting asked what templates I used, so I figured I’d make a blog post to share everything I’ve found about mask making in one blog.
But before I get into all the mask making info, here are some local groups you can join, donate too, help, buy from, etc:
Give Back
The Coding Sharks School, in Jax, needs donations to make shields for medical workers.
We have a group for the 904 area where medical personnel post their needs and also mask makers come to sell or donate masks. You can join it on Facebook here.
Cotton fabric–many use the fleece on the mouth side for comfort.
You can pick up fabric at Joann‘s (order online and they’ll deliver it to your car. ALSO, if you go in, they were giving away a free mask making kit, one for each customer. It should make 2-4 masks). Download their app on your phone for coupons.
Fabric.com is another good one, but because of COVID they are limiting the types of things you can purchase, so the cheaper fabric is sometimes not available. Scroll to the bottom of their page and sign up for their newsletter to get 10% off.
Spoonflower is kind of like Etsy but for fabric. You’ll find some fun ones there.
This material is supposed to be better than N95: Haylard H-600 2 ply
You can see a video about it here:
Elastic
The local stores seem to be running quite short on elastic. You can buy flat or round elastic.
Flat elastic holds better for sewing and you don’t have to knot the ends, the down side is, it probably bothers ears more and you want to make sure you lay it correctly while sewing so it lays flat in use.
The round skinny elastic is what I bought and what I use. I figured it would be better for wearing. The only downside I’ve found is I have to tie the ends to help keep it from coming out of the mask. I bought this from Amazon, it’s 109 yards. I’ve made over 100 masks and I don’t think I’ve used even half of this! Def. a great value.
Side note, if you want to make the mask more fitted around the nose, you can buy some pipe cleaners. Standard size, cut in half. I tried to order them off Joanns.com and they didn’t have them, but they did have them in store, and you have to go inside to get them. Or you can order some off Amazon.
This has a video on how to make one but also goes into how to clean a mask.
If you decide to buy N95s:
On the news, N95 seems to be the best, but when I went to buy them online, I found different codes, if you’re concerned about where you buy them from I found this list of codes as to where each comes from:
Three fun, easy, and educational rhythm activities to do with your kids during quarantine
By Alisha Ramcharitar, Owner/Founder, Just Add Rhythm LLC
Developing any kind of schedule during this quarantine can be tough. Parents have to multi-task like never before – handle the household, home school, work remotely, and somehow safely get groceries.
How can you keep the kids entertained during those long stretches at home?
Here, we give you three simple ideas for your kids to access the fun and benefits of rhythm from home – no instruments required.
BYO Drum
Recently, I hosted a Quarantine Songs Jam Session for families on Facebook Live. Beforehand, I invited all participants to find items around their house they could use as instruments – Tupperware containers, pencils/pens, pots/pans, salt and pepper shakers…you get the idea. Invite your kids to get creative, and don’t be afraid to join them! Schedule a family fun evening where everyone BYO’s their most creative idea to the jam session. Play along to our Facebook Live session:
Next, let’s try a game. This is a crowd pleaser during our in-person sessions for all ages, and it’s super simple. One person plays a short excerpt of a song on their “drum,” and everyone else has to guess what it is. The obvious challenge is that because you’re only hearing the rhythm and not the melody, it’s harder to guess the song correctly.
Of course, we encourage everyone to pick songs that most people will be familiar with (like nursery rhyme songs, Christmas or holiday songs, patriotic songs, etc.). The example I usually give when I demonstrate is the Happy Birthday song (aren’t we all sick of singing that while we wash our hands).
Check out this Spotify playlist of songs almost everyone knows the words to (just be sure to check which few songs are explicit if you choose to play the recording) for some pop-inspired ideas.
Part of the fun is trying to figure out how to actually play the song on your instrument. Once someone guesses it, you can all try to play it together – and have a laugh if you mess up!
Rhythmic Breathing
Finally, being stuck at home and dealing with this quarantine can be stressful. Your kids might feel anxiety or worry about the health and safety of themselves, their family, their friends. They might be wondering when it will end, and when they can go back to school, back to their usual activities. Or, they (and you!) might just need a mental break.
We can help them manage some of that stress or anxiety with a rhythmic breathing exercise called the Stopwatch Technique. Percussionist Jim Donovan (formerly of the band Rusted Root) leads transformational rhythm programs to empower people to use sound to improve their health. He developed this simple technique that aligns slow, deep breathing with light rhythmic tapping on your lap. Follow along with Jim’s video here:
We’re all in this together
Did you find these activities fun and helpful? Drop a line on Facebook to let us know how the kids enjoyed them, and be sure to follow us.
We’re all in this together. Please reach out to us if we can offer you any additional resources, exercises, or techniques to try! Rhythm is fun, and it’s also been proven to help improve our mental, physical, and emotional health. Let’s get drumming!
Alisha Ramcharitar, M.A. is a global bridge between West African culture and corporate and community wellness. The Founder of Just Add Rhythm, she leads interactive, innovative programs in the Jacksonville area and throughout Florida. Alisha is a REMO endorsed and HealthRHYTHMS® trained facilitator. She and her husband are the proud parents of an energetic baby boy and an even more rambunctious Goldendoodle. She’d like to think she’s as good a ukulele player as Zooey Deschanel.
Cute ways to incorporate photos into your arts
& crafts projects.
Children love to be creative. Whether it’s finger painting on a Saturday morning or a new macaroni portrait of the dog, arts and craft projects are a fantastic way to not only get them to have some fun by exerting those creative juices but it’s also great for keeping them busy for a while.
If you’re
always taking photos and are looking for new ways to display them, incorporating
your latest shots into your child’s next arts and craft project is the perfect way
to do just that.
Below are some
fun ideas.
Frame your memories. There are so many fun frames that you can make with your children that
can be used to display your favorite
photoss. If you’re heading to the seaside for your next
holiday, make a point of bringing back a few shells that can be used to create
a cute frame.
Create a puzzle. Choose one of your favorite photos, enlarge it and print it. Stick the photo on some sturdy
cardboard and coat it with an acrylic spray to protect it. Cut out some puzzle
shapes and let your child put the photo back together again. OR, check out this method for making a Lego
puzzle: https://www.icanteachmychild.com/lego-picture-puzzles/
Craft a fridge magnet. Get your child to draw something from their imagination but leave a
space for a photo in the picture. Laminate the drawing and attach magnetic
sheets or tape to the back for an instant photo frame for your fridge.
Make a mobile.
A mobile is a unique way to display your family tree. Checkout sites such as
Pinterest for inspiration. There are tons of creative templates to use.
Make a coaster. See those photos year round with a cool tile coaster, or put it on an
easel for display. Maybe even put your child’s hand print on the back!
Make an ornament! Use the photo transfer method mentioned below to transfer the image
onto a ceramic ornament.
Doing a
photo transfer is a great way to do many projects: http://www.architectureofamom.com/2014/11/photo-transfer-ceramic-ornament.html?utm_source=feedburner&utm_medium=email&utm_campaign=Feed:+ArchitectureOfAMom+(Architecture+of+a+Mom)&crlt.pid=camp.EpAnoqboi8df
Using
family photos in your next arts and crafts session is the perfect way to bond
with your child and share some beautiful memories. Have fun!
Christy
Whitehead is a professional photographer in Jacksonville, Florida. She
specializes in newborn, families and headshots. Don’t feel like making your own
art wall? Christy has lots of cool portrait options from prints mounted to wood
or even printed on metal.
Tips
for what you need to consider before you pay that photography deposit.
Finding the perfect photographer can be overwhelming. There are a couple of important things to consider before booking.
What style are you looking
for?
Photographers
have different styles so you need to decide on someone who can help you achieve
the end result you are looking for. This applies to everything from wedding and
maternity shoots to family and corporate shoots. Ask the photographer for some
examples of their latest work to evaluate whether they can cater to your needs.
Quality?
Look
at their website and Facebook page. Are the portraits in focus? Are the colors
off? Is the posing good?
Photographers
typically only post a couple of their best photos from a session, so if the
ones posted aren’t that great, it’s not a good sign.
Research and review.
Before
you invest in a professional photographer you need to do your homework. Get
online to find a few customer reviews, browse around their website to view
their latest work and have a look around their social media pages to find out what
others are saying about them. These platforms will also give you a good idea of
their personality and style.
We
have a ton of positive yelp reviews and Facebook reviews.
Some
other important points to consider when researching photographers are:
Budget. Do their services fall within your price range? Do they have a payment plan?
Expertise. Are they experienced enough to give you the results you are looking for?
Location. Are they based in your area and are they willing to travel to a specific location if need be? Do they have a studio?
Quality. Is the quality of their photos good enough? Look at aspects such as sharpness, exposure, and saturation.
You
don’t want just anyone handling your sweet new baby. Check to make sure the
studio is licensed and insured. How many newborns have they photographed? What
safety measures do they take?
Where
are they photographing your baby or family? On railroad tracks–that is illegal.
In a glass jar–highly dangerous! Hanging in a crocheted blanket from a tree
limb–scary!
What about after the
session?
Does
the photographer provide any retouchups? Head swaps?
Our
studio does full retouchups, removing acne, marks, etc. This is included as
part of our service.
Who to choose?
Get
in touch with the photographers you are considering and ask any questions that
you might have. It’s important that you chat with the photographer over the
phone if not in person as this is the best way to get to know them and find out
whether you’re comfortable with them and feel they can do the job you need them
to do.
It’s
important that you pick a photographer that you have confidence in. While there
is nothing wrong with helping out your hobby photographer friend who has just
started out, it’s best to choose an experienced photographer for important
events and occasions that you can’t relive.
Our studio does studio and on location portraits and we’d be happy to discuss your session ideas with you.